What we do today
- Understand the big picture of the system
- Understand AWS networking concepts
- IP Address Concept and Settings
- Create VPC
- Create subnet
- Routing
- Summary
If you haven’t read my previous post explaining account creation and initial setup, click here.
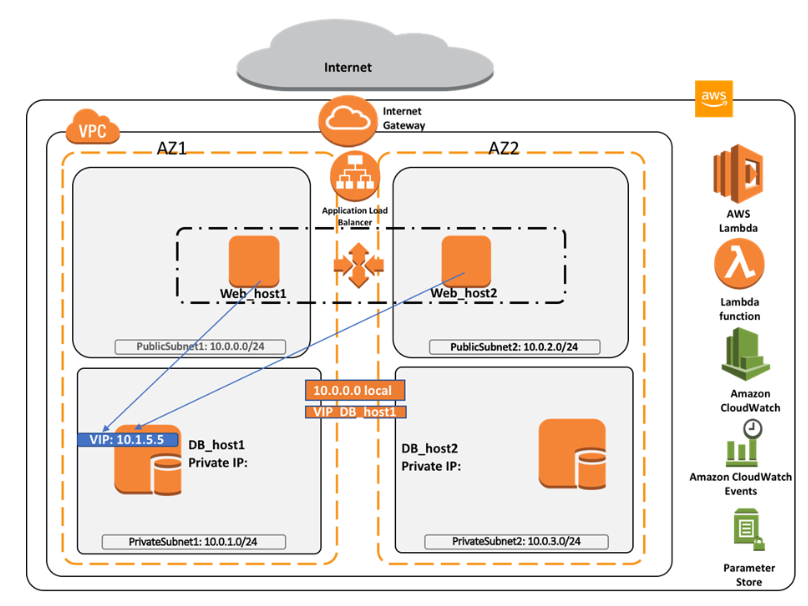
1: First system blueprint to be created
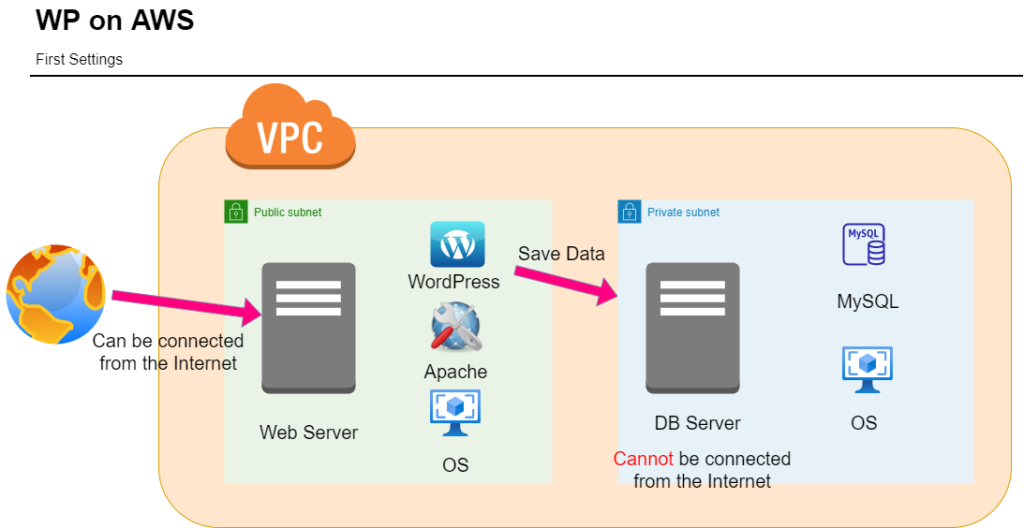
It connects to the web server where WordPress is installed; WordPress is connected to the database, which retrieves and stores data.
WordPress is located on a public subnet and can be connected to from the Internet, whereas the database is located on a private subnet and cannot be connected to from the Internet.
The aim is to keep databases that contain important data hidden from the Internet.
2. AWS networking concepts
Choose the region closest to where you live!
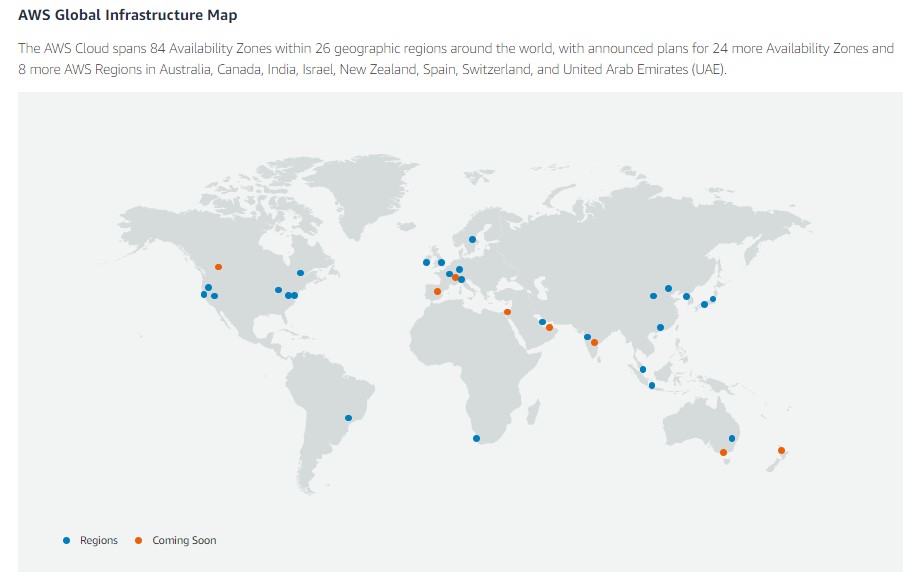
Be aware of which region you are currently working in.
Multiple independent data centers per region, called availability zones. In the figure below, the orange wavy lines are the availability zones.
Select a region, create a VPC there, and select an availability zone within that VPC
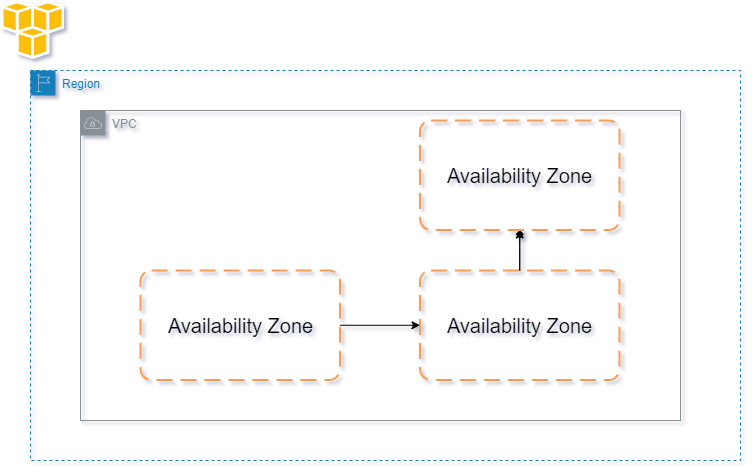
Then, create subnets within those availability zones.
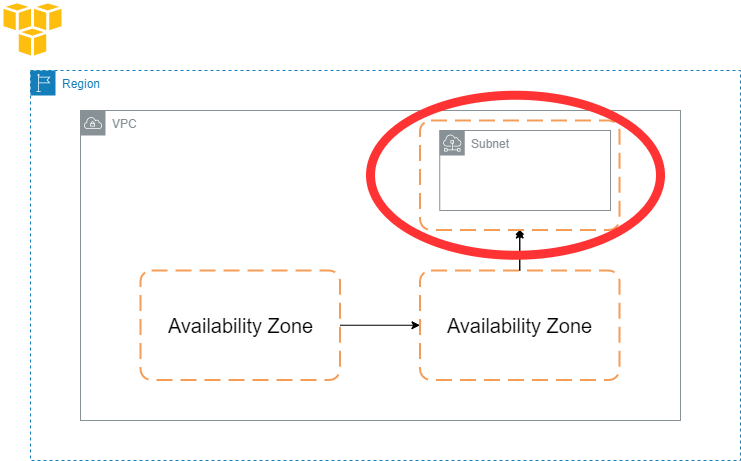
The above is simplified in the following figure. By setting up subnets across multiple availability zones, they are redundant and can respond even in the event of a disaster, i.e., they are highly available.
In other words, a subnet is a network of divided VPCs.
3. IP Address Concept and Settings
Before talking about IP address, let’s quickly review what we are making.
The above is simplified in the figure below. In other words, these are the three networks to be prepared for this project.
The following figure shows the above network plus availability zones and IP addresses.
The numbers highlighted in yellow are IP addresses, which are addresses on the Internet that identify devices on the network.
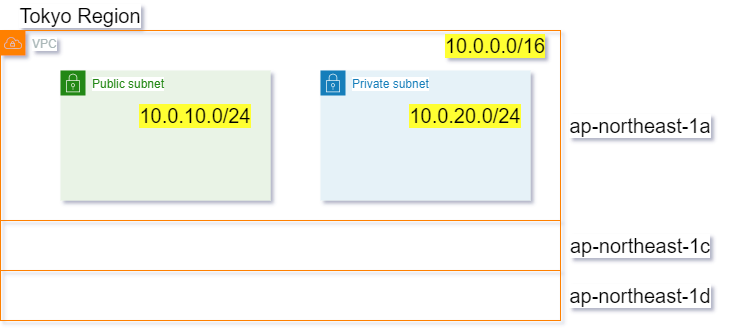
An IP address is a non-overlapping number on the network, a 32-bit integer value, divided into four pairs of 8 bits each, and expressed in decimal with a period.

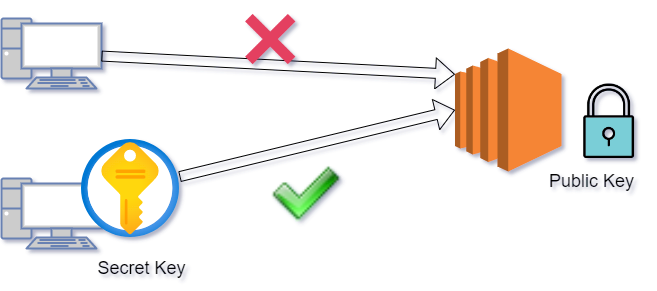
There are public and private IP addresses, and the one that connects to the Internet is the public IP address, which is managed by an organization called ICANN. This public IP address is leased from a provider, server operator, or AWS.
On the other hand, private IP addresses, such as those shown in the previous figure, are not used on the Internet. Private IP addresses are used when building internal LANs or experimenting with networks.
For your information, private IP addresses may be used freely within the following limits.
10.0.0.0 – 10.255.255.255
172.16.0.0 – 172.31.255.255
192.168.0.0 – 192.168.255.255
4. Create VPC
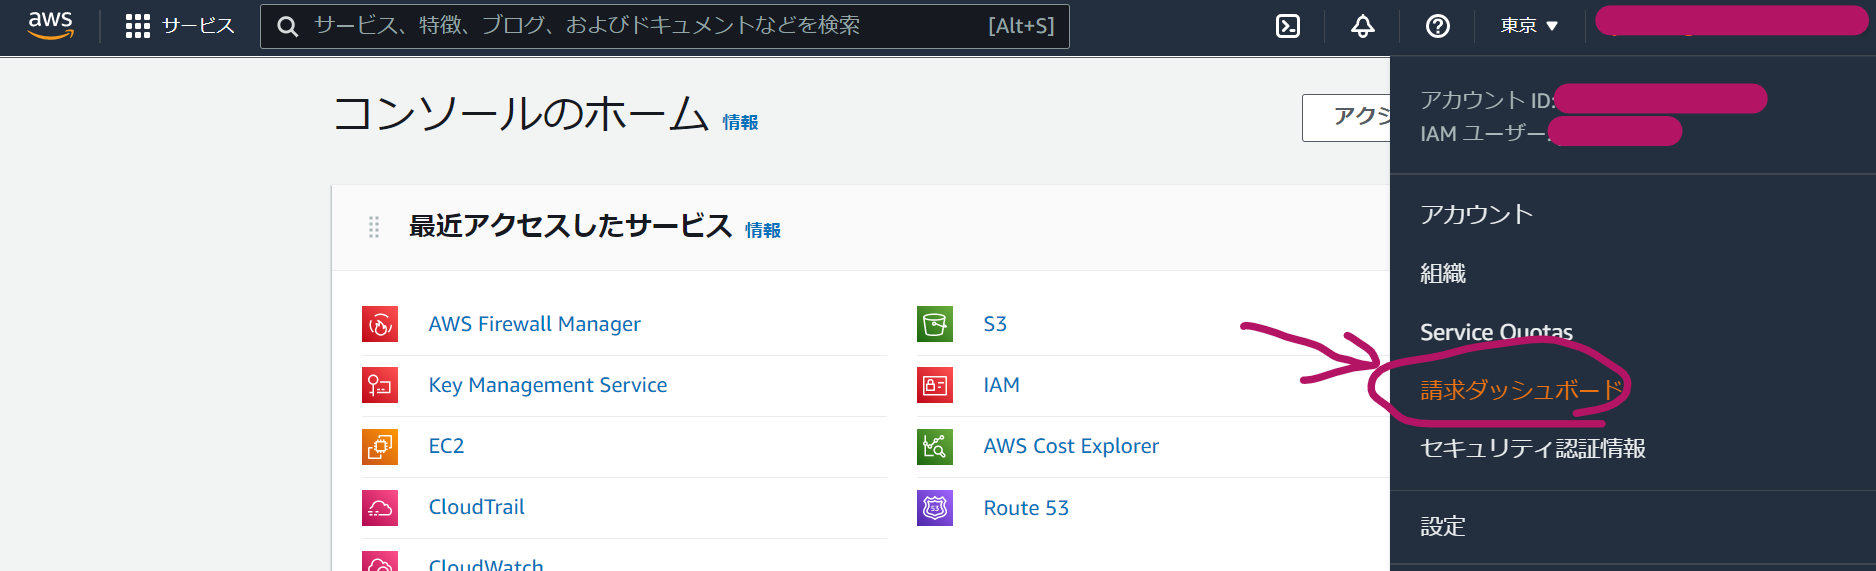
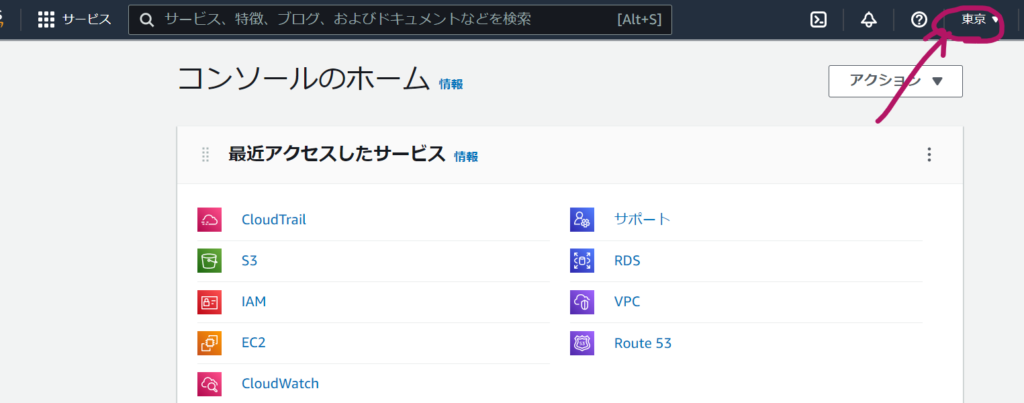
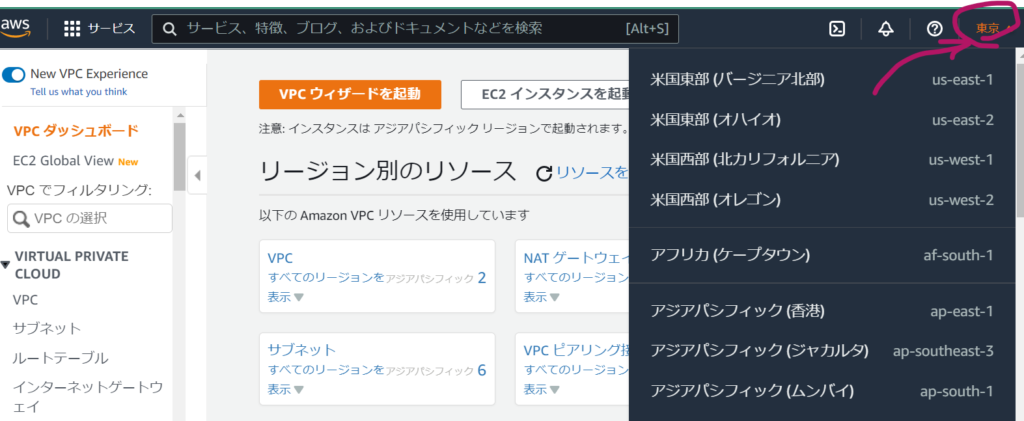
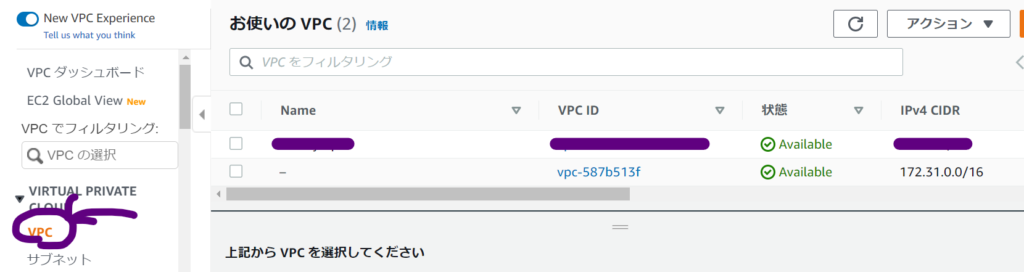
When you go to the VPC dashboard by typing VPC in the search bar of the management console, check the region first.
Select the region where you want to create your VPC. The region closest to where you live is recommended.
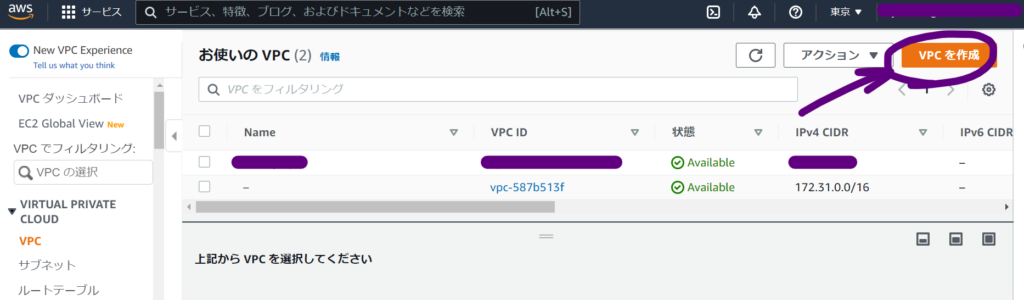
If you select VPC in the sidebar, a VPC is already created by default, but you do not use it; you create your own.
Click the “Create VPC” button in the upper right corner
The name tag of the VPC should be a name that is easy for you to recognize later. Also, the IPv4 CIDR should be 10.0.0.0/16 as decided earlier.
Tenancy is an option to occupy physical hardware and is more expensive than usual, so if you do not need to occupy hardware, leave it as the default.
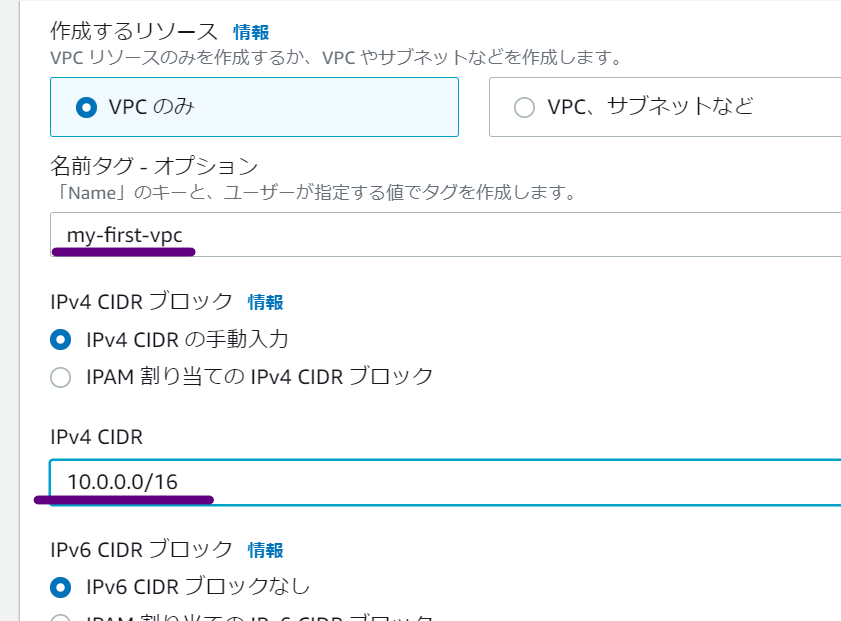
Then click create, and when you see the message that the creation was successful, click close.
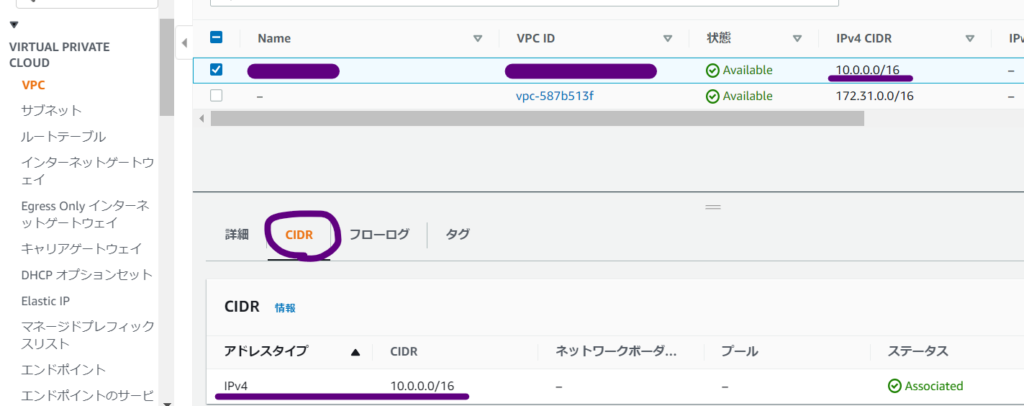
Select the VPC you have already created and click on the CIDR tab to see the IP address you have just set.
5. Create subnet
Now, we will divide the VPC we just created into subnets.
In a VPC, the range of IP addresses that can be used is large, so subnets are used to divide them up for ease of use.
Subnets can be located in different availability zones, increasing fault tolerance.
Subnets also increase security because they allow you to set up a web server that you want to connect to the Internet and a database that you do not want to be accessed from the outside.
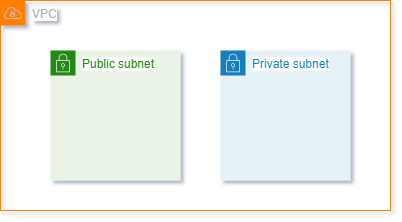
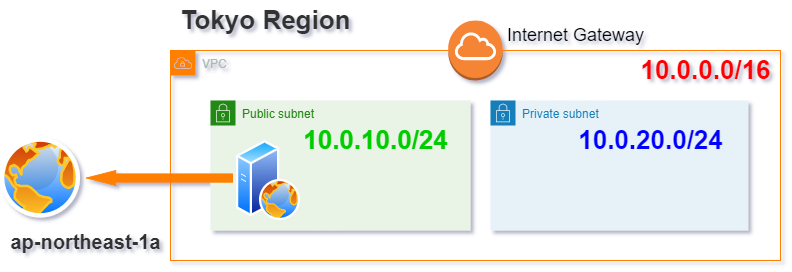
Now look at this image again.
Create a public subnet and a private subnet in the availability zone 1a in the selected region.
The green public subnet contains the web server and the blue private subnet contains the database, making this a highly secure configuration.
If you click on the word Subnets, in the sidebar of the VPC dashboard, you will see the subnets created by default, but do not use them; instead, click on the Create Subnet button in the upper right corner.

Select the VPC for which you want to create a subnet, enter “public” and “1a” for the subnet for easier management later, select a region, and enter the IP address you determined earlier.
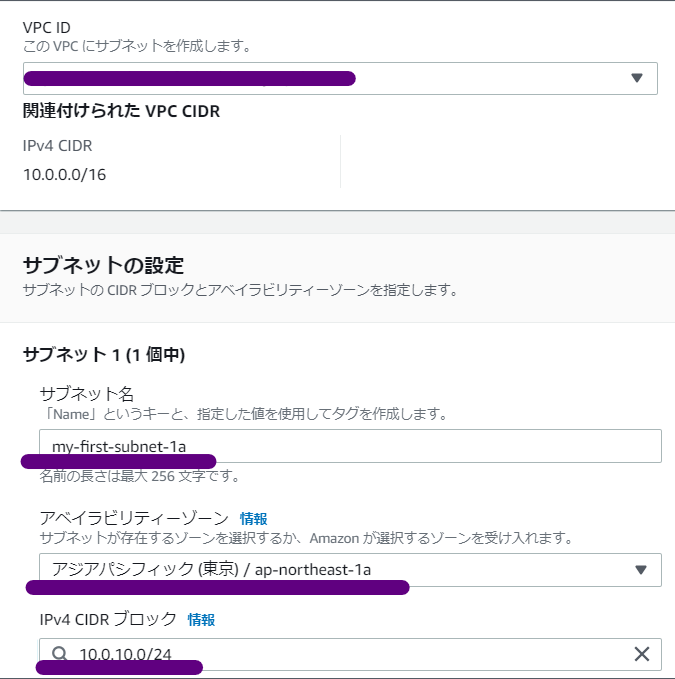
Similarly, now create a private subnet. For ease of management later, add “private” and “1a” as part of the name. The IP address is 10.0.20.0.0/24.
6. Routing
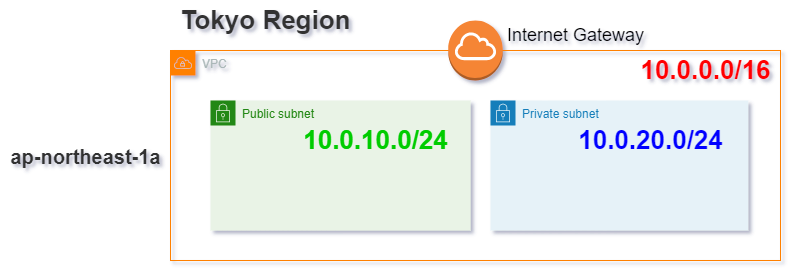
The public subnet must be able to connect to the Internet because the public subnet will eventually house the web server and install WordPress and other necessary software.
Routing makes this possible.
AWS allows you to set up routing for VPCs and subnets, each with its own routing configuration. In this case, we will connect the public subnet to the Internet Gateway. The Internet Gateway is a virtual router, which we will now create.
What we do here
- Create an internet gateway and attach it to your VPC.
- Create a route table and link it to the public subnet.
Let’s get started!
- First, enter the VPC dashboard and click on the Internet Gateway in the left sidebar.
- Click “Create Internet Gateway”
- Give it a descriptive name and end it with “igw” to identify it as an “Internet gateway.”
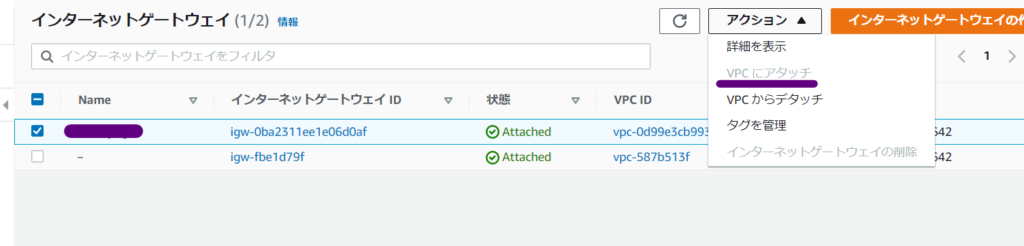
- Immediately after the Internet gateway is created, the underlined part in the figure below is “Detached”, and by linking it to the VPC we created, it will be in the “Attached” state as shown in the figure.

- Select the Internet gateway you want to link to your VPC and select “Attach to VPC”.
- On the “Attach to VPC” page, select the VPC you want to link to the Internet gateway from the pull-down menu. Then click the attach button.
Create a route table and link it to the public subnet
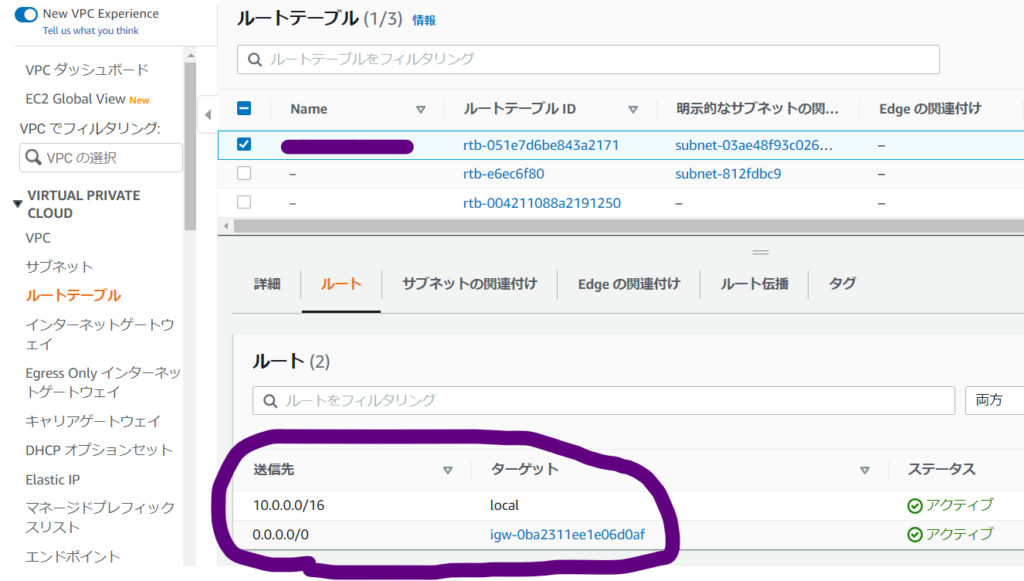
- Click “Route Table” in the left sidebar of the vpc dashboard
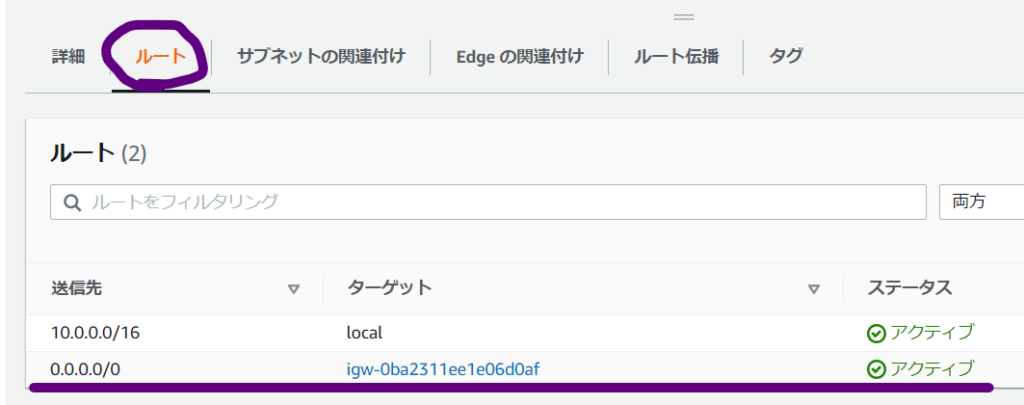
- In 10.0.0.0/16 in the figure below, the destination is itself and the target is local. Add 0.0.0.0/0 to set the default gateway to connect to the Internet.
- First, click the “Create Route Table” button
- Name tag: Name that is easy for you to understand. It’s easier to understand if you add “route” to the end.
- VPC: Select the VPC you want to link from the pull-down menu.
- Currently, the route table created above is linked to the VPC, so this time we will also link it to the public subnet.
- After selecting the route table you want to associate, select the “Associate Subnet tab” below.
- Then click the “Edit Subnet Association” button
- Now click on the public subnet you want to associate with, select it, and save it.
Set the default route to the internet gateway
- After selecting the public subnet route in the route table, select the Routes tab below and click Edit Route.
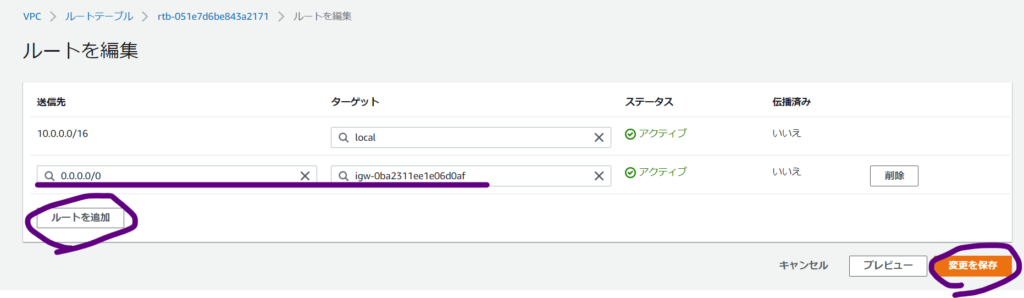
- Click Add Route in the figure above and add 0.0.0.0/0 underlined.
- Select the Internet gateway as the target. Then, the Internet gateway you created earlier will be displayed in the pull-down menu, so select it.
- Finally, click the “Save Route” button.
7. Summary
With today’s work, we have been able to associate the route table Internet gateway with the public subnet. In other words, we will be able to connect to the Internet from the public subnet.
On AWS, we start by designing the network on the VPC. Since a VPC creates a virtual private network space, it is recommended to use a private IP address.
Subnet splitting is typically based on routing and availability zones. Also, two Availability Zones are often used for high availability in the event of a failure.