✅ In this post, I will explain the procedure up to SSH login.✅
Build a web server on the network we built last time. A web server is installed on a virtual server called EC2 provided by AWS.
Install EC2 instance
Connect to your EC2 instance with SSH
Understand the port number
Install Apache
Set up a firewall
Fix the IP address with Elastic IP address
First, set up an EC2 virtual server and SSH in. After logging in to the server, install Apache. By installing Apache, the server will function as a web server. Next, set up a firewall to increase security and finally fix the IP address.
Install EC2 Instance
procedure
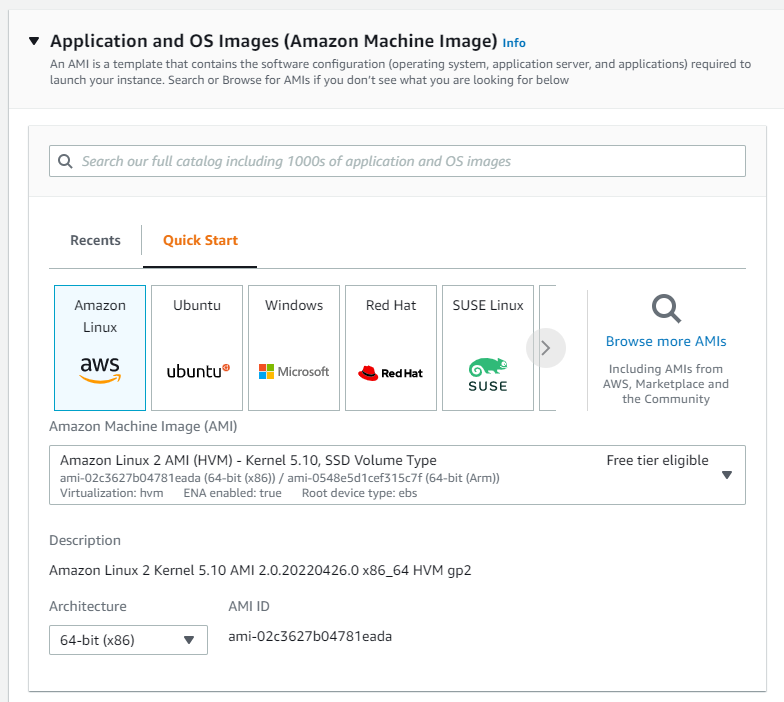
Select AMI (Amazon Machine Image): Like a server template that contains the OS required to start an instance
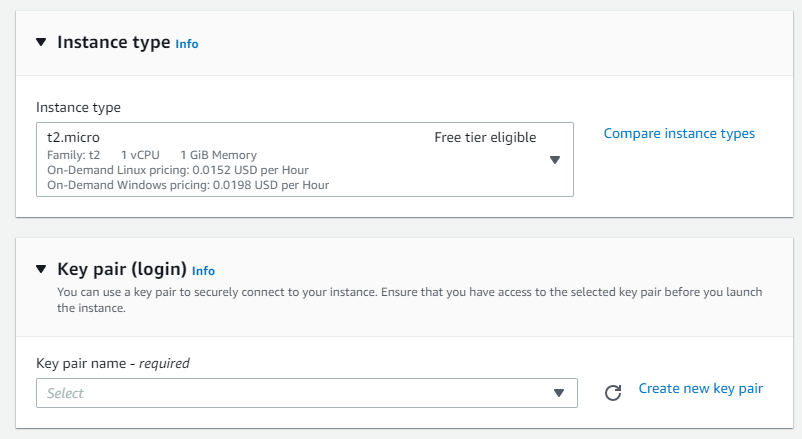
Select an instance type: Defines the specifications (CPU, memory, storage, network bandwidth) of the EC2 server.
Add storage (EBS or Instance Store)
Set up a security group
Set up an SSH key pair
How to install EC2 on a public subnet
Step by Step Guide
Go to EC2 from the management console and select “Instance”. Click “Launch Instances” at the top right of the screen.
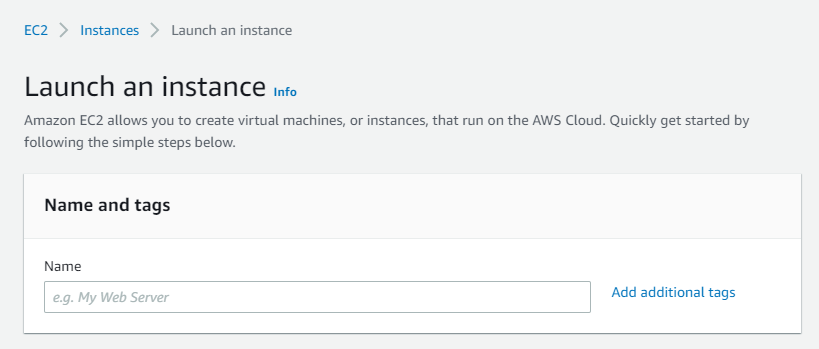
Give your instance a name
We choose Amazon Linux this time.
It comes pre-populated with the packages and settings needed to run AWS services and easily integrates with many AWS services.
t2micro is good for now.
But what is t2micro?
T3/T2 This instance type is characterized by its ability to “burst”. This means that if “CPU credits” are stored when the load is low, when the load suddenly increases, the stored CPU credits can be consumed to cope with it. For example, a website that shows a tendency for the load to be concentrated only at certain times of the day would be a good example of this.
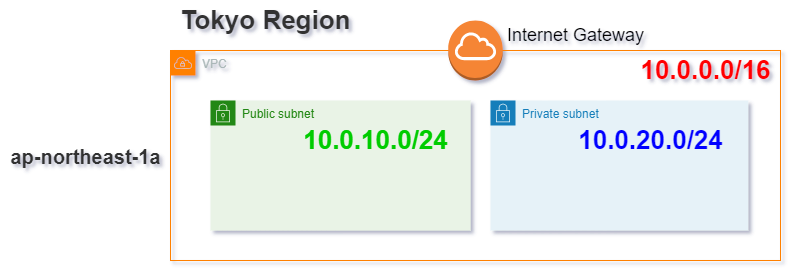
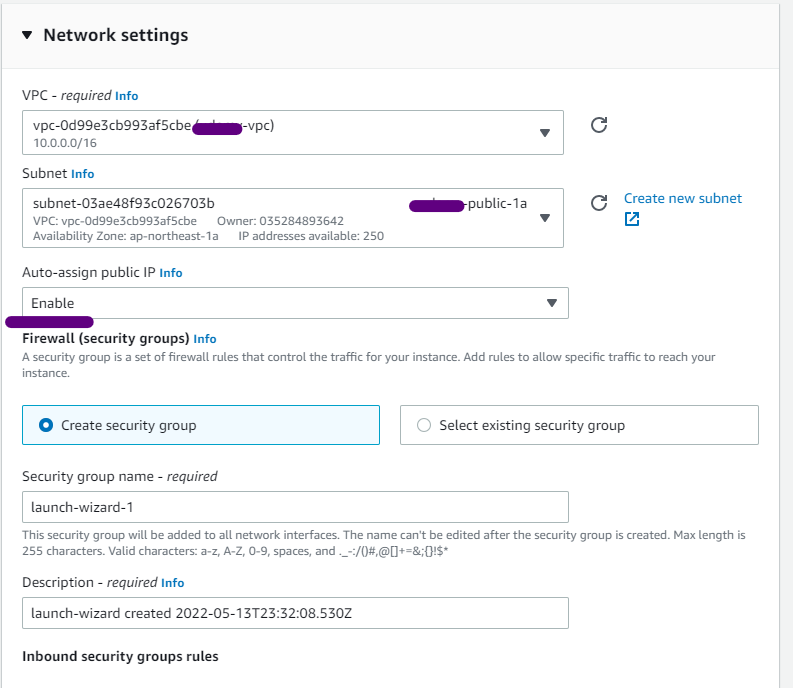
Select the VPC and select the public subnet you just created. Also, since you want this instance to be connected to the Internet, enable the public IP address.
Security Group
How it works
The security group is associated with the instance to be protected (in this case, the web server that is a virtual instance).
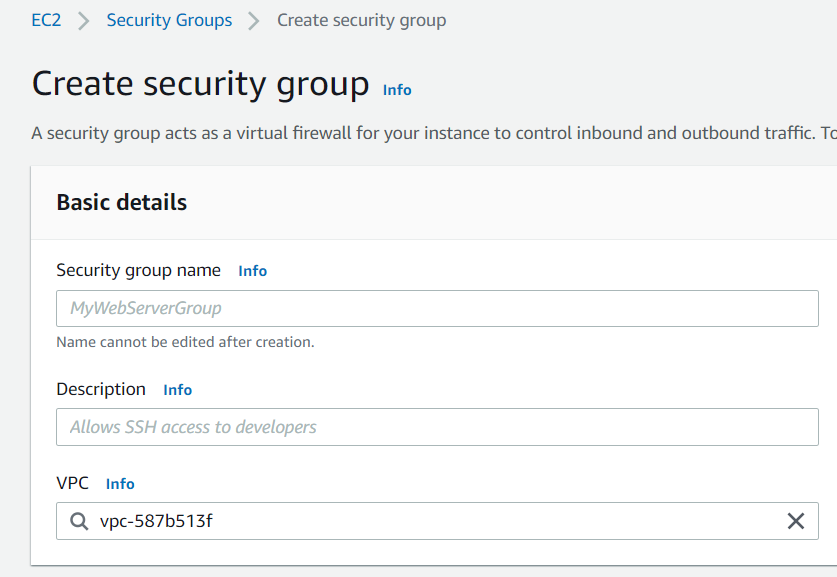
Now, let’s create a security group associated with that instance.
Give it a security group name and associate it with the created instance.
Security groups can define two types of filter settings, inbound rules and outbound rules, using IP addresses and port numbers.
Inbound rule settings
Set inbound rules.
Nothing is set by default. In this case, implicit Deny is applied and all access is blocked.
Add a rule to allow only SSH login. Click Add Rule as you can see below.
We’ll add other rules later, but first open port 22 to allow SSH login.
To allow SSH, select SSH as the type. The protocol and port range are automatically registered.
Custom: You can specify a CIDR block or security group.
Anywhere-IPv4: All IPv4 addresses are covered. If specified, 0.0.0.0/0 will be registered.
Anywhere-IPv6: All IPv6 addresses are covered. If specified, :: / 0 will be registered.
My IP: The global IP address of the terminal accessing the setting screen is registered.
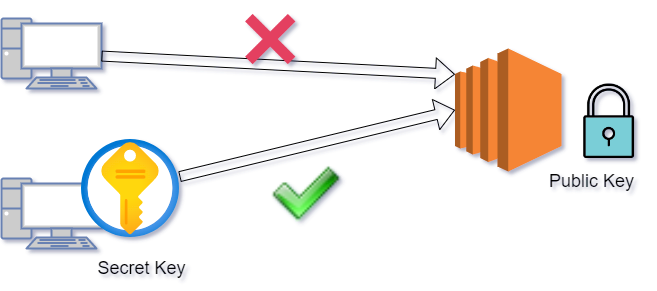
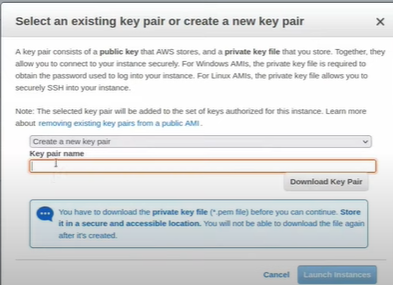
Create and save the key pair required for SSH connection (be careful not to lose it).
A key pair is the key to logging in to your instance.
A key pair, consisting of a public key and a private key, is a set of security credentials that you use to prove your identity when connecting to an Amazon EC2 instance. Amazon EC2 stores the public key on your instance, and you store the private key. For Linux instances, the private key allows you to securely SSH into your instance.


 aws.amazon.com
2 package(s) needed for security, out of 5 available
Run "sudo yum update" to apply all updates.
aws.amazon.com
2 package(s) needed for security, out of 5 available
Run "sudo yum update" to apply all updates.